Create Multiple Regions of Interest (ROI)
plantcv.roi.multi(img, coord, radius, spacing=None, nrows=None, ncols=None)
returns roi_contours, roi_hierarchies
- Parameters:
- img = Input image data.
- coord = Two-element tuple of the center of the top left object.
- radius = Radius of ROIs.
- spacing = Two-element tuple of the horizontal and vertical spacing between ROIs.
- nrows = Number of rows in ROI layout.
- ncols = Number of columns in ROI layout.
- Context:
- Used to define multiple regions of interest in the same image. Users can either specify a
starting coordinate (
coord), number of row and columns, and spacing to create a grid of ROIs, or a custom list of coordinates that specify the centers of the ROIs. Providing a custom list of coordinates (list of tuples) is useful for missing plants or any arrangement that isn't a perfect grid. Returns lists of contours and hierarchies that can be used in downstream steps.
- Used to define multiple regions of interest in the same image. Users can either specify a
starting coordinate (
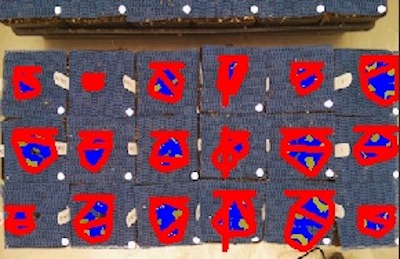
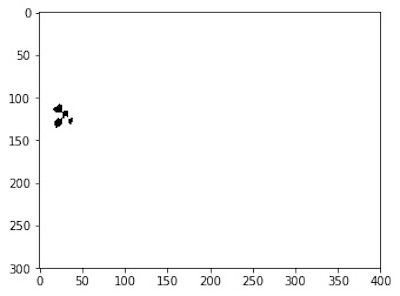
Reference Image
from plantcv import plantcv as pcv
# Set global debug behavior to None (default), "print" (to file),
# or "plot" (Jupyter Notebooks or X11)
pcv.params.debug = "print"
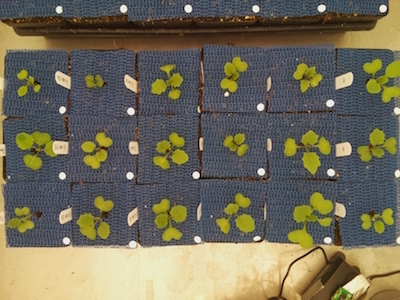
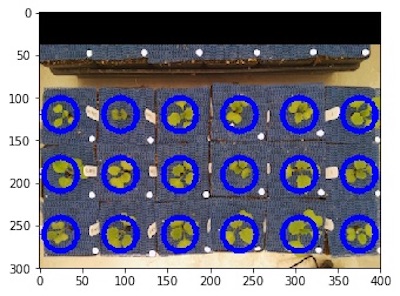
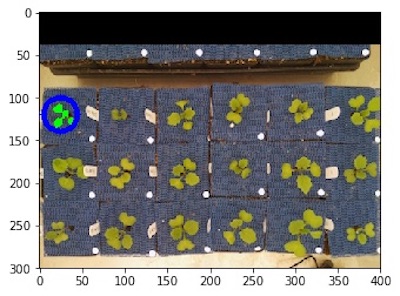
# Make a grid of ROIs
rois1, roi_hierarchy1 = pcv.roi.multi(img=img1, coord=(25,120), radius=20,
spacing=(70, 70), nrows=3, ncols=6)
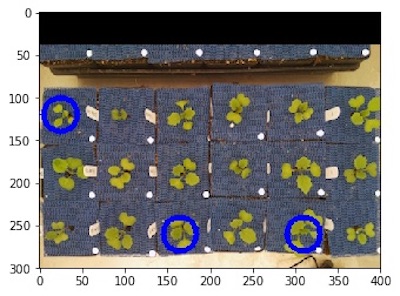
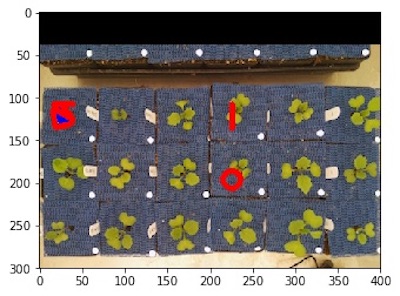
# Specify a list of coordinates of desired ROIs
rois2, roi_hierarchy2 = pcv.roi.multi(img=img1, coord=[(25,120), (165,260), (310, 260)],
radius=20)
Grid of ROIs
Custom list of ROIs
Next steps:
Since this function returns lists of objects and hierarchies, the downstream steps require users to loop over each. The pcv.roi_objects and pcv.object_composition functions usually follow an ROI step.
import numpy as np

img_copy = np.copy(img)

# The result file should exist if plantcv-workflow.py was run
if os.path.exists(args.result):
    # Open the result file
    results = open(args.result, "r")
    # The result file would have image metadata in it from plantcv-workflow.py, read it into memory
    metadata = results.read()
    # Close the file
    results.close()
    # Delete the file, we will create new ones
    os.remove(args.result)

for i in range(0, len(rois1)):
    roi = rois1[i]
    hierarchy = roi_hierarchy1[i]
    # Find objects
    filtered_contours, filtered_hierarchy, filtered_mask, filtered_area = pcv.roi_objects(
        img=img, roi_type="partial", roi_contour=roi, roi_hierarchy=hierarchy, object_contour=obj,
        obj_hierarchy=obj_hierarchy)

    # Combine objects together in each plant
    plant_contour, plant_mask = pcv.object_composition(img=img, contours=filtered_contours, hierarchy=filtered_hierarchy)

    # Analyze the shape of each plant
    analysis_images = pcv.analyze_object(img=img_copy, obj=plant_contour, mask=plant_mask)

    # Save the image with shape characteristics
    img_copy = analysis_images

    # Print out a text file with shape data for each plant in the image
    filename = args.result[:-4] + "_" + str(i) + ".txt"
    with open(filename, "w") as r:
        r.write(metadata)
    pcv.print_results(filename=filename)
    # Clear the measurements stored globally into the Outputs class
    pcv.outputs.clear()

# Plot out the image with shape analysis on each plant in the image
pcv.plot_image(img_copy)
Custom list of ROIs
Custom list of ROIs
Custom list of ROIs
Many intermediate outputs later...
Image with shape analysis characteristics on each plant